10 Essential Knots Everyone Should Know

Audio Version
The Best Types of Knots to Learn, Including How to Tie a Knot When Hanging Hammocks
Whether you want to ensure your hammock is tied securely or you simply want to build on your knot-tying skills, here’s a guide to knots, including the 10 essential knots everyone should know when hammock camping and exploring the great outdoors.
FEATURED PRODUCT: PARACHUTE EXPEDITION HAMMOCK – DOUBLE
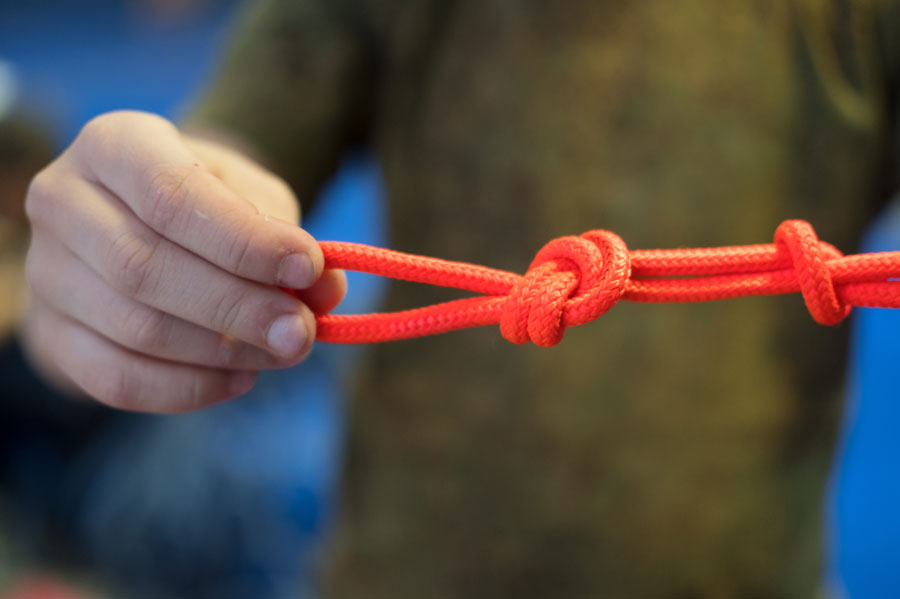
KNOTS, EXPLAINED
Basic Knots
A basic knot is used as a stopper to prevent a rope from slipping through a bolt eye or a similar structure. But these days, people refer to knots, hitches, and bends as knots.
Examples of basic knots include:
Bowline, Nail, Square, Water, Fisherman’s, Surgeon’s, and Figure 8
Hitches
A hitch is used to tie a rope to another object, usually another piece of rope or a cylindrical object such as a stake or a tree. Hitches are useful for strapping down objects you’re transporting or want to hold down/control.
Types of hitches knots include:
Cat’s Paw, Barrel Hitch, Clove Hitch, Half Hitch, Rolling Hitch, Taut Line Hitch, and Round Tie and Two Half Hitches
READ MORE: HOW TO SAFELY HANG A HAMMOCK FROM A CAR
Bends
A bend is used to tie two different ropes together, especially if you have two different sizes of rope or you’re lengthening a cut piece.
Examples of bend knots include:
Beer Bend, Hunter’s Bend, Figure 8 Bend, Sheet Bend, Slim Beauty Bend, and Flat Overhand Bend
KNOT TERMINOLOGY
To help you understand knot-tying lingo, here are the basic terms you should know:
Working End: The part of the rope you are working with to tie a knot.
Standing End: The part of the rope you are not using to tie a knot.
Tail: The short end of the rope that is being knotted.
Turn: Rope that is turned around an object.
Jamming: A knot that is very difficult to untie.
Eye: The loop created with a rope and knot.
Bight: A semicircle of rope bent into a U-shaped section.
10 ESSENTIAL KNOTS TO KNOW
Here are the best types of knots and uses for hiking, camping, and enjoying the great outdoors.
READ MORE: TOP 12 ONTARIO BACKPACKING TRAILS – YOURS TO DISCOVER

1. Half Hitch
This basic camping knot is used as a foundation for many other knots. While not very secure on its own, it can be doubled for strength.
The Half Hitch is often used to quickly tie a rainfly to a tree and for anchoring gear to the eye bolt of a vehicle.
READ MORE: HAMMOCK CAMPING IN COLD, RAINY WEATHER? HERE’S THE GUIDE TO KEEP YOU WARM & DRY
FEATURED PRODUCT: HAMMOCK RAIN FLY - 70D OXFORD POLYESTER – RIPSTOP
To tie a half hitch, run a loop around an object, like a post or pole. Then pass the working end around the standing end and through the loop.

2. Round Turn Two Half Hitch
This hitch is used to secure a rope to a pole, often for lashing objects together. It won’t usually jam together, so it is easy to untie and is ideal for guy lines. And it is also easy to tie once you’ve mastered the half hitch.
This hitch is also resistant to fraying, so it can be used to tie to an abrasive object, such as a metal ring or grommet.
To tie this hitch, do two full turns around an object with a rope. Make one half hitch and pull it tight. Make another half hitch in the same direction and pull it tight.

3. Taut Line Hitch
The Taut Line Hitch is a moveable knot that can be adjusted up or down a length of rope. This knot is often used to anchor a boat to shore, attach the guy line of a tent to pegs, hang a hammock with adjustable tension, or tie a rainfly to stakes and trees for easy adjustments.
READ MORE: 7 TIPS FOR HAMMOCK CAMPING WITH MAN’S BEST FRIEND
To tie a Taut Line Hitch, take the rope and do a single turn around the pole, leaving a bit of slack. Run the tail end around the standing end twice. When continuing for a third pass, run the tail end between itself and over the standing end. Then pull to tighten. The knot should be able to move up and down with ease.

4. Clove Hitch
The Clove Hitch is used as a temporary camping knot to hold something in place that won’t put much stress on the rope (e.g. tying back tree branches, attaching gear to a carabiner or other suspended objects, such as hanging cooking pots and pans). It should not be used to hold something securely in place.
To tie a Clove Hitch, run the working end around the pole for a complete turn. Cross over the standing end to create another turn. And run the tail end under itself and tighten.
READ MORE: WHY CAMPING IS BECOMING MORE POPULAR AMONG MILLENNIALS

5. Sheet Bend
The Sheet Bend is used to attach two ropes of different sizes or thickness and is often used to extend the length of a guy line or extend broken shoelaces.
To tie a Sheet Bend, bend the thicker or more slippery rope into a J shape, like a fish hook. From behind, pass the other rope through the hook shape, wrap it around the entire fishhook once, and then tuck the smaller line between itself and the other rope.
To tie a Sheet Bend with fabric or a tarp, collect, squeeze, and shape the material into a J shape, and then run your rope through and around the J.

6. Fisherman's Knot
A Fisherman’s Knot is used to secure objects to the end of a rope, such as a fishing hook, or tying two ropes together.
If tying an object to the end of a rope, run the working end through the eye of the object. Wrap 4 to 5 loose turns over the standing end. Bring the working end back through the eye, passing it through each of the turns. Then tighten and cinch the knot tight.
If tying two ropes together, hold both ends of the rope together. Run the tail end of the right rope over and behind the left rope and tie an overhand knot. Repeat for the left rope. Then tighten the knots and pull the standing ends to pull the knots together.

7. Bowline
The Bowline knot is used to secure a load, such as hanging food from a tree or hoisting a person up from a difficult location. It won’t slip, and it cannot be tied or untied when there is weight on it.
To tie a Bowline knot, form a small loop at the centre of the rope. Leave enough rope on the sides. Pass the tail of the rope through the loop. Pass the remaining tail through the inside loop. The rope tail must go inside the bottom loop. Pull through until the knot is secured.
READ MORE: DEALING WITH MOSQUITOS - HOW TO CAMP IN PEACE
FEATURED PRODUCT: MOSQUITO NET FOR HAMMOCKS

8. Reef or Square
The Square or Reef knot is used to tie and secure two bunches of objects together. For example, it can be used for packing up a tarp and gear or bundling firewood and kindling together.
To tie a Square or Reef knot, meet two ends of a rope together. Then cross the right end over the left end, and then cross the left end over the right end, and tighten to form a square-shaped knot.

9. Figure 8
This reliable camping knot is used as a stopper, and it is easy to untie. It also damages the rope less than some other types of knots.
To tie a Figure 8 knot, form a loop and place the tail of the rope underneath the standing end. Then pass the working end through the loop to form a figure 8.

10. Double Figure 8
The Double Figure 8 is used by climbers because it is easy to untie, and it allows for equal weight distribution between two points. It is also useful for hanging your food out of reach from bears.
READ MORE: ROCK CLIMBING AND HAMMOCKS – A MATCH MADE IN HEAVEN
To tie a Double Figure 8 knot, form a long bight in the rope. Then create two double loops and make a figure 8. Pull the end of the bight through the bottom of the figure 8 and pull into place.
Pull the original bight beneath, up, and over the rest of the knot. Pull it tight to secure the two loops.
READ MORE: CLIMBING AND VERTICAL CAMPING SAFETY BASICS
THE DO'S AND DON'TS OF KNOT-TYING
Do:
- Practice tying knots at least once a week while watching TV or on the bus/train home to sharpen your skills and memory
- Use good quality rope and cords to avoid wear and tear
- Use knots for their intended purpose
Don't:
- Risk/trust your life based on rope strength
- Try to master many knots. Start slow—you can get by with knowing around 5 or 6 easy-to-remember knots that are useful for a variety of purposes
- Give up on developing this skill. While learning to tie knots can take time, knot-tying is a skill worth having

THE BEST KNOTS FOR HAMMOCKS
When hanging hammocks, the best knots to use are:
Bowline
Used as an extension of carabiners, rings, or chain links of a hammock.
- Form a small loop at the centre of the rope. Leave enough rope on the sides.
- Pass the tail of the rope through the loop.
- Pass the remaining tail through the inside loop.
- The rope tail must go inside the bottom loop.
- Pull through until the knot is secured.
READ MORE: A BEGINNER’S GUIDE TO HAMMOCK CAMPING
FEATURED PRODUCT: MOSQUITO NET HAMMOCK NYLON 210D
Taut Line Hitch
Useful for hammock camping since it can be easily tied and untied.
- Bring the rope tail across the tree/post and curl the remaining rope behind the loop you’ve just made.
- Round it over the tree again and pull through.
- Tighten the knot as much as you want by sliding the hitch back and forth.
READ MORE: THE BEST HAMMOCK CAMPING GROUNDS ACROSS CANADA
Hammock Knot
This knot is one of the easiest ways to hang a hammock from a tree and is used with carabiners, rings, and tree straps/webbing.
- Pass the rope through the carabiner or ring from top to bottom.
- Flip the webbing over the top of the carabiner/ring from right to left.
- Make a loop with the tail end of the rope webbing from top to bottom of the carabiner/ring.
- Pull the knot tight.
READ MORE: 10 BEST NATIONAL PARKS FOR HAMMOCK CAMPING IN THE U.S.
Wrapped Knot
Wrapped knots are used for a secure knot, especially when hanging a hammock from an O-ring instead of a closed loop.
- Secure a cord of rope on the other side of the ring by tying a basic knot.
- Move down a few inches and fold it. Pull the rope end back to the ring upward.
- Wrap the rope end on the cord that attaches to the hammock as firmly as you can.
- Move the rope end downward, towards the fold.
- When the wrapped area is at least 2 inches long, cross the rope end through the looped area that was folded.
- Pull the downward end and upward end to tighten.
- Tie a basic knot to tie the upward end to the tree.
READ MORE: 10 TIPS FOR HAMMOCK CAMPING LIKE A PRO
THE TAKEAWAY
Learn a handful of these knots so you can impress everyone the next time you need to tie up something quickly and securely.
Whether you’re hanging your hammock in your yard or you’re going on a backcountry camping trip, your life will be a lot easier if you’ve mastered the art of tying knots.
Safety First!
When using a hammock*, safety is paramount. Please make sure to follow these important guidelines when purchasing, installing and using a hammock
*(includes Hammock, Hammock Chair, Hammock Stand and Hammock Accessories)


