How to DIY an Underquilt and Top Quilt for Your Hammock

Audio Version
The Ultimate Underquilt and Top Quilt Guide You Need to Stay Warm and Comfy While Hammock Camping
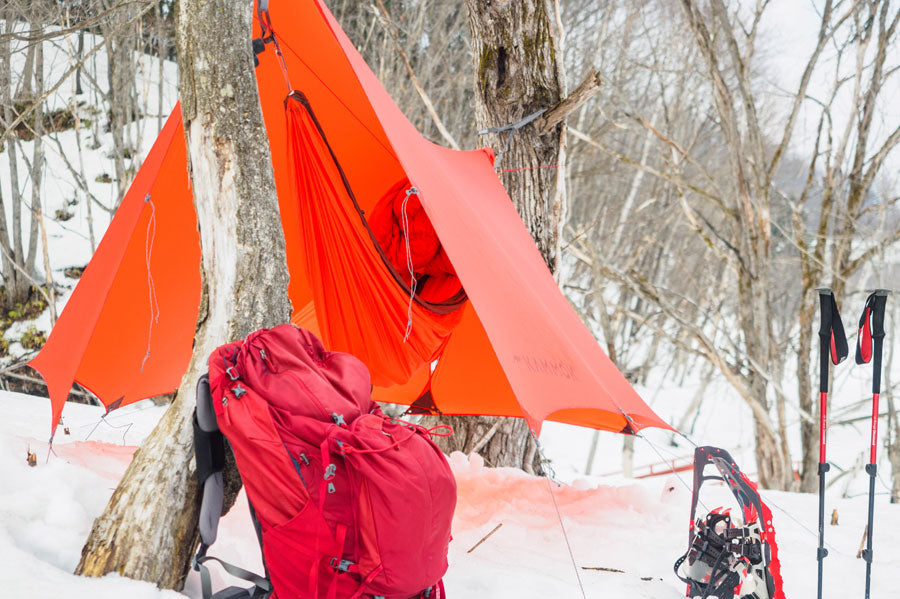
Camping with your hammock during the shoulder season offers peace, seclusion, and serenity. You’ll be in your element enjoying the crisp air, fall colours and maybe a sharp breeze to remind you winter is around the corner. But it’s easy to stay warm and cozy in the great outdoors as long as you have a durable camping hammock you can count on, proper gear, attire, and heat insulators.
High-quality underquilts and top quilts can rack up quite a large bill, so to help you stay warm while hammock camping at a fraction of the cost, we’ve built a DIY underquilt and top quilt guide for your next hammock camping adventure.
How to Heat Things up in Your Hammock
Staying warm in a hammock is easy with the right clothes and insulation. For optimal warmth and comfort, you’ll want your hammock to have both top and bottom insulation. You can use a hammock sleeping pad for your bottom insulation and a sleeping bag to insulate the top of your body. Alternatively, you can use a hammock underquilt and top quilt for maximum insulation, warmth, and overall comfort.
Sleeping pads are usually lighter and smaller than underquilts, making them easier to pack and carry. And they are more versatile, giving you an insulated bed to sleep on even when you don’t have a good spot to hang your hammock. Sleeping pads are also less expensive than underquilts for the most part.
As convenient as they are, sleeping pads are typically more uncomfortable than underquilts since it can be challenging to stay on your sleeping pad all night and maintain insulation. You wouldn’t want to struggle with positioning and stability on top of trying to stay as warm as possible. That’s a surefire way to have little to no sleep.
Are Hammock Underquilts Really All That?
Yes, they definitely are. A hammock underquilt provides insulation so you won’t freeze at night while you’re sleeping in your hammock. Without these insulators, what happens is cold air passes underneath your hammock and through the fabrics leaving your body feeling nothing short of chilly.
Hammock underquilts are also designed to be so well insulated that you can forego the uncomfortable sleeping pad.
Quilts Vs. Bags – What’s the Difference?
A hammock quilt is like an unfurled sleeping bag. It has a nylon or polyester shell and is filled with down or synthetic insulation. These materials are so similar, you can make a DIY underquilt from a sleeping bag.
But unlike a sleeping bag that covers you from tip to toe, underquilts hang below and cover the bottom of your hammock, and top quilts cover the top of you just like a blanket.
As far as warmth goes, underquilts provide better insulation for the bottom half of your body than sleeping in a sleeping bag. Sleeping bags compress under your weight and lose the loft that keeps you warm. Since underquilts aren’t affected by your weight, they maintain their insulating loft while you’re hanging in your hammock which is what makes them the best option.
Hammock quilts also allow for more freedom of movement so you can sleep comfortably instead of being confined to your sleeping bag. And you can stay warmer throughout the night instead of worrying about moving off the sleeping pad.
What’s the Best Filler?
The fill of a hammock quilt is the insulating material that keeps you warm by trapping in your body heat. Fill is either made of down or synthetic materials, but the best type will depend on your personal preferences and whether you suffer from allergies to the various materials used.
Down is an excellent insulating material and has been used for thousands of years to keep us warm through cold nights. It will undoubtedly keep you warm and it can be easily compressed to a smaller size, making for ideal ultralight hammock underquilts and top quilts for backpacking. But if the down fill isn’t protected by a waterproof shell and rain fly, the down will lose its insulating qualities when wet.
As the leading insulator, down fill tends to be more expensive than synthetic insulation.
Let’s Get Started!
Materials Needed to Make an Underquilt and Top Quilt
To make your own underquilt and top quilt, you will need the following materials:
- Seam ripper;
- Sewing kit or machine;
- 1.5-inch wide grosgrain ribbon;
- 1/8-inch shock cord; and,
- Two double packable down throws, such as the double Black Diamond 60” x 70” 700 fill down throws from Costco.
4 Easy Steps to Make the Top Quilt
To make your own top quilt, follow these hammock top quilt DIY steps:
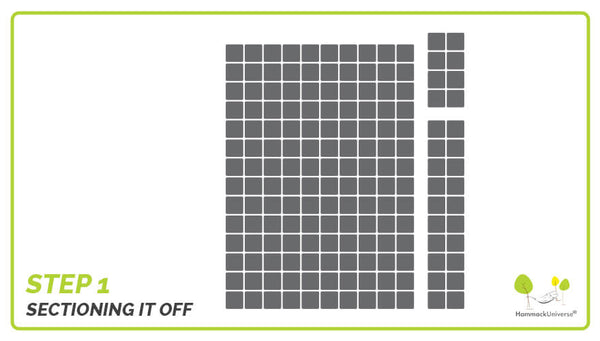
Step 1 – Sectioning it Off
Unpack and lay one down throw flat on the floor. Next to the second vertical column of squares, sew an additional seam down the length of the throw.
Cut the throw along this seam, removing a section with two columns—14 x 2 squares. From this section, cut a 4 x 2 square section. Keep both the 4 x 2 and the remaining 10 x 2 sections.
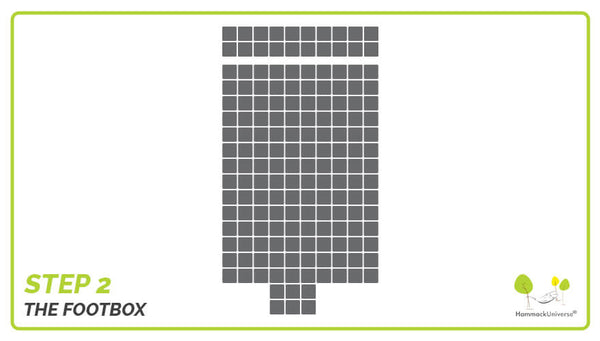
Step 2 – Footbox for Your 10 Friends
To make the base of the footbox (the bottom of the quilt where your feet will be), use the seam ripper to seam rip the 4 x 2 section so it forms two long parallel baffles.
Stuff the down to one side so it is located in a 3 x 2 section. Cut off and discard any leftover 1 x 2 fabric.
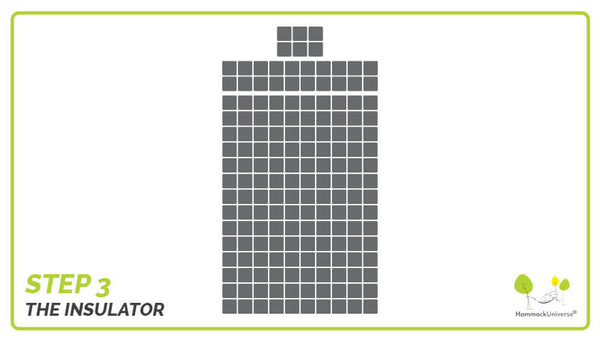
Step 3 – Getting More from Your Insulator
Since the down throw will likely have a square quilt design, use the seam ripper to create long parallel baffles. These new baffles should run across the width of the throw, not the length. Seam rip the inner seams going down the length of the throw.
This will take some time, but it will be worth it for the extra insulation and better loft in the hammock.
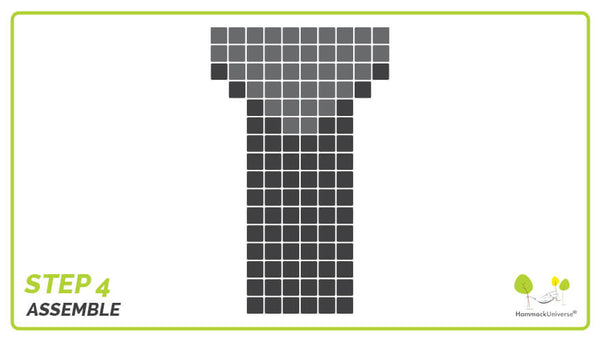
Step 4 – Put it All Together
Take the 10 x 2 section from step 1 and lay it at one end of the quilt so it is flush. Then centre the base of the footbox (the 3 x 2 section) next to the 10 x 2 section.
Sew the 10 x 2 section to the quilt, and then sew the 3 x 2 section to the 10 x 2 section to create a footbox
Take both sides of the bottom of the quilt, fold them together, and sew along the outside to complete the footbox. The footbox will take up about six rows of the quilt.
DIY Underquilt in Just 2 Steps
You don’t need complicated DIY hammock underquilt plans to make an effective bottom insulating layer. Instead, follow these simple steps to learn how to make your own underquilt for a hammock:
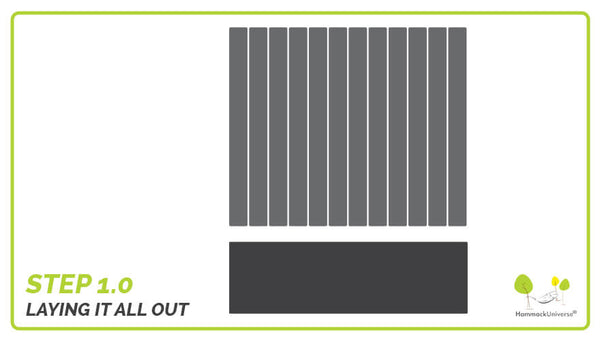
Step 1 – Laying it All Out
Lay down the second throw and seam rip all the horizontal 60-inch seams. Shake the down and squeeze it so it goes to one side of the quilt.

Sew a new seam along the length of the quilt, about 25 inches. Cut and discard the extra fabric. Fluff the quilt so it gains a loft of about 2 inches.

Step 2 – Assemble!
Sew a channel along each of the four sides of a quilt using 1.5-inch-wide grosgrain ribbon. Then attach a 1/8-inch shock cord to each corner of the quilt. The shock cord is used to suspend and adjust the underquilt on your hammock.
How to Attach Underquilt to Hammock
For optimal warmth and comfort, follow these simple steps for attaching an underquilt to your hammock.
This will be easier with a partner. Grab a friend, grab your hammock and let’s get started! Have your friend get in your hammock so you can start attaching the underquilt. It should be suspended underneath your hammock with minimal tension on the quilt. You must also make sure there are no, or minimal, air gaps between the hammock and the quilt as this will work against the purpose of insulation.
Place your hand between the hammock and the quilt to check for air gaps. Eliminate any air gaps by adjusting the suspension of your quilt. Make small 1/2-inch adjustments on each of your suspension lines until there are no air gaps and the quilt has a full loft.
If a quilt is suspended with too much tension, it will lose its loft (flatten) and its insulating qualities. So while adjusting the suspension to reduce air gaps, feel the outside of the quilt for loft, and make sure it stays full.
Hammock camping isn’t just a summer hobby. With your own DIY underquilt and top quilts, you can discover the warmest way to go hammock camping in the fall and winter months. Whether it’s 30 °C or -30 °C, there are ways for you to keep your favourite hammock out of storage all year round.
Safety First!
When using a hammock*, safety is paramount. Please make sure to follow these important guidelines when purchasing, installing and using a hammock
*(includes Hammock, Hammock Chair, Hammock Stand and Hammock Accessories)


Hammock Universe Canada
$168.91 CAD$135.91 CAD


Hammock Universe Canada
$409.88 CAD$399.88 CAD


Hammock Universe
$469.94 CAD$379.94 CAD


